# Get Started
If you want to use Waline in your site, please follow this guide.
# Get APP ID and APP Key
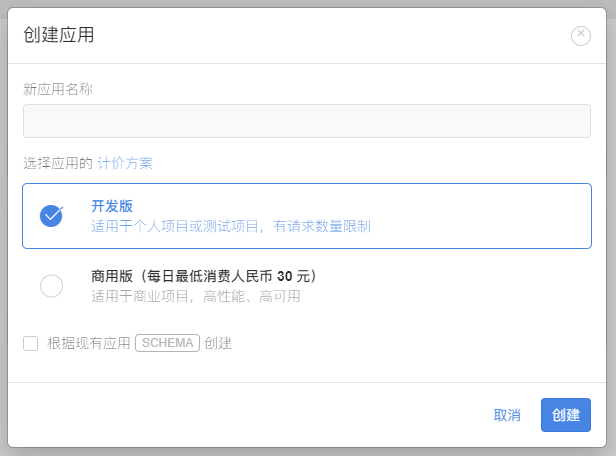
First you need sign inopen in new window or sign upopen in new window LeanCloud. Then go to Consoleopen in new window and click Create appopen in new window button to create a new app:
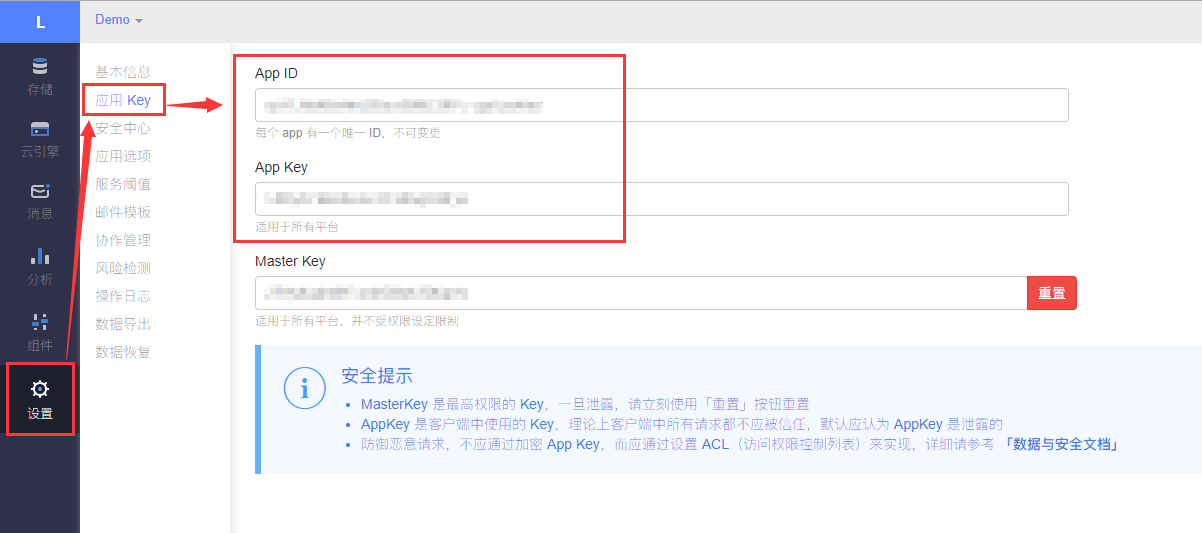
After app is created, we need click into it. Select Settings > App Keys at the left bottom side, then you can see APP ID, APP Key and Master Key of your app!
# Deploy to Vercel
Click the blue button above, it will redirect you to vercel to deploy with waline template. We recommend you to sign in with GitHub if you don't have a vercel account. Input your Vercel project name after login.

Click Continue to the next step then input your new GitHub repo name. The repo will be created and initiallized automatically base on waline example template by Vercel.

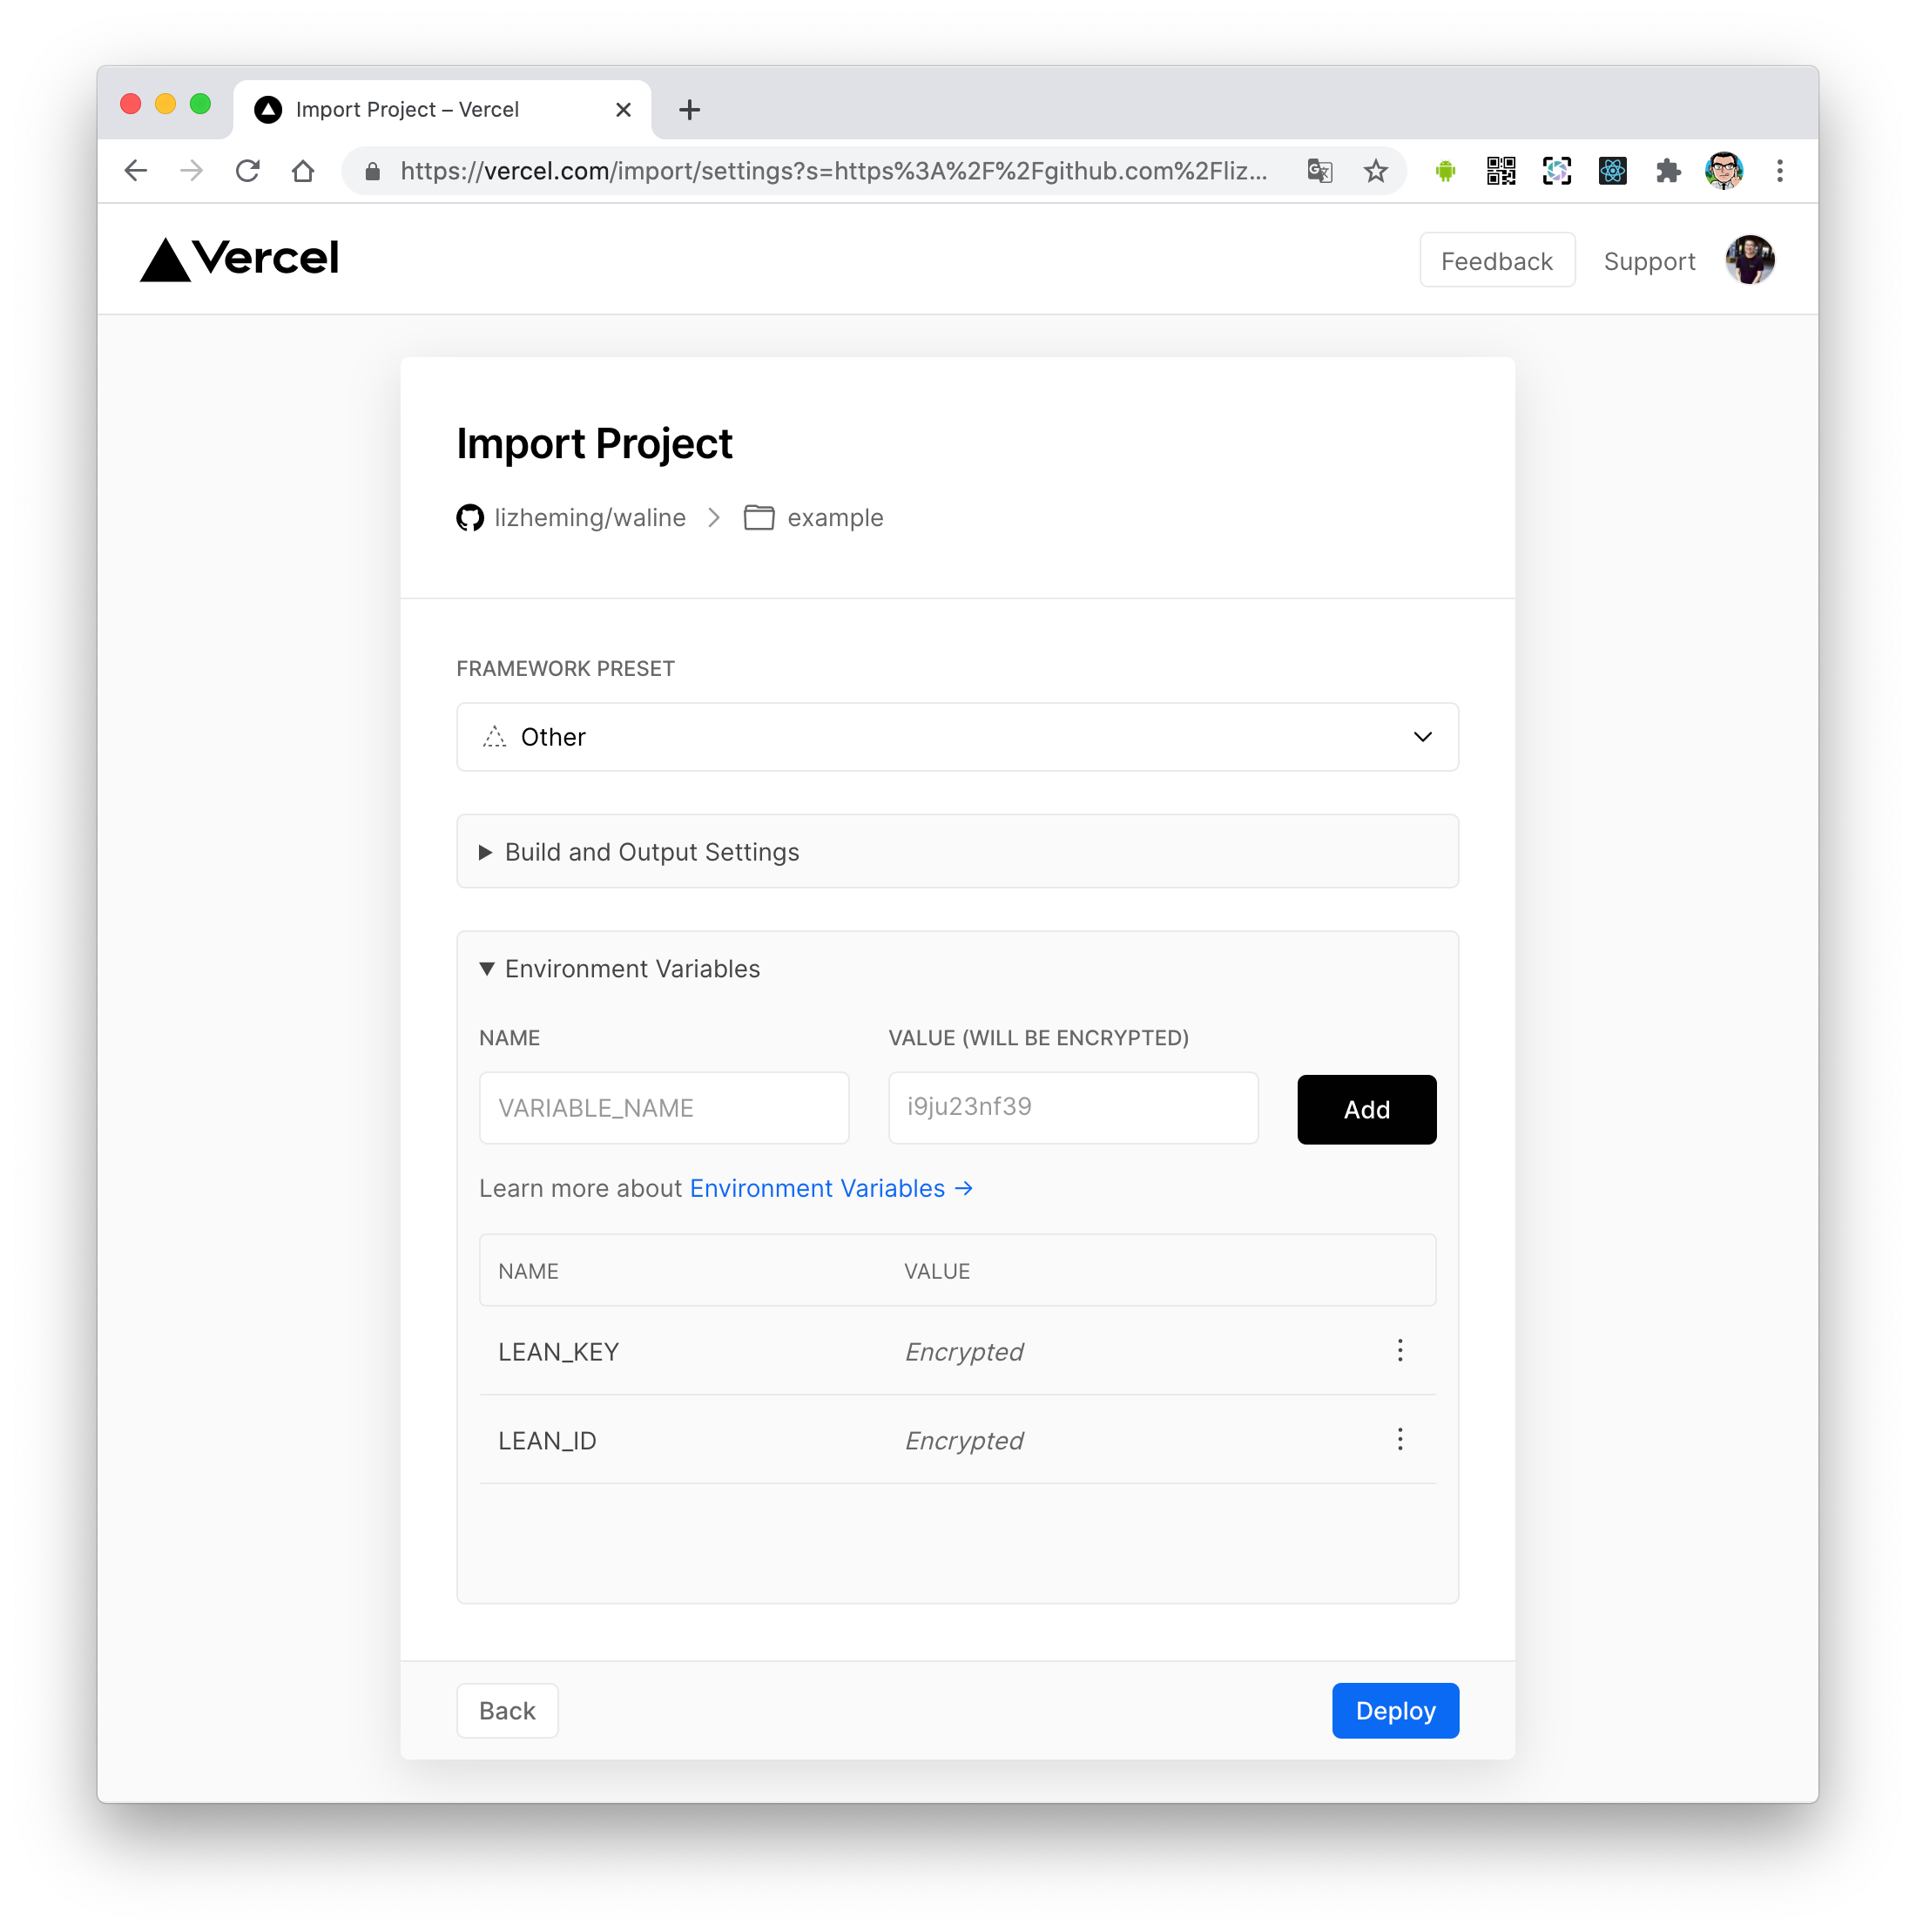
Now the repo is initialized. It's ready to deploy to Vercel! Setting LEAN_ID, LEAN_KEY and LEAN_MASTER_KEY environment variables in the "Environment Variables" column is required. The variables' value are what you get on the previous step in LeanCloud. APP ID is the value of LEAN_ID, and APP Key to LEAN_KEY, Master Key to LEAN_MASTER_KEY.
Finally click Deploy button, and vercel will tell you the deployment finishes successfully after one or two minutes. Now you can click Visit button to visit the site. Please memorize the site's url, we will use it in next step.

# HTML References
Set serverURL option with the site url in options.
<head>
  ..
  <script src="//cdn.jsdelivr.net/npm/@waline/client/dist/Waline.min.js"></script>
  ...
</head>
<body>
  ...
  <div id="waline"></div>
  <script>
    Waline({
      el: '#waline',
      serverURL: 'https://your-domain.vercel.app',
    });
  </script>
</body>
2
3
4
5
6
7
8
9
10
11
12
13
14
15
# NPM
You can use npmopen in new window to install Waline instead of CDN link. Install in CLI like this:
yarn add -D @waline/client
npm i -D @waline/client
// Use import
import Waline from '@waline/client';
// or Use require
const Waline = require('@waline/client');

Waline({
  el: '#waline',
  // other config
  ...
});
2
3
4
5
6
7
8
9
10
# Comment Management
Waline provides a simple admin control panel for us to manage comment data. You can register in <serverURL>/ui/register after deployed successfully. The first person registered will be administrator.